Product added to cart
How to Connect a RO System in Your Home: Step-by-Step Guide
0%
Installing a reverse osmosis (RO) system in your home is an excellent way to ensure that you have access to clean, filtered water. Not only can it remove impurities and contaminants, but it can also improve the taste and odor of your drinking water. However, connecting a RO system to your home can be a daunting task, especially if you're not familiar with plumbing and installation. In this blog post, we'll guide you through the process of connecting a RO system in your home step-by-step.
Step 1: Choose a Location The first step in connecting a RO system in your home is to choose a location. You'll want to choose a location that is easily accessible and has enough space for the system. Keep in mind that the system will need to be connected to your water supply, so you'll want to choose a location that is close to your main water line. It is also important that your RO system is kept out of direct sunlight and in a position where it will not be subjected to extreme hot or cold temperatures.
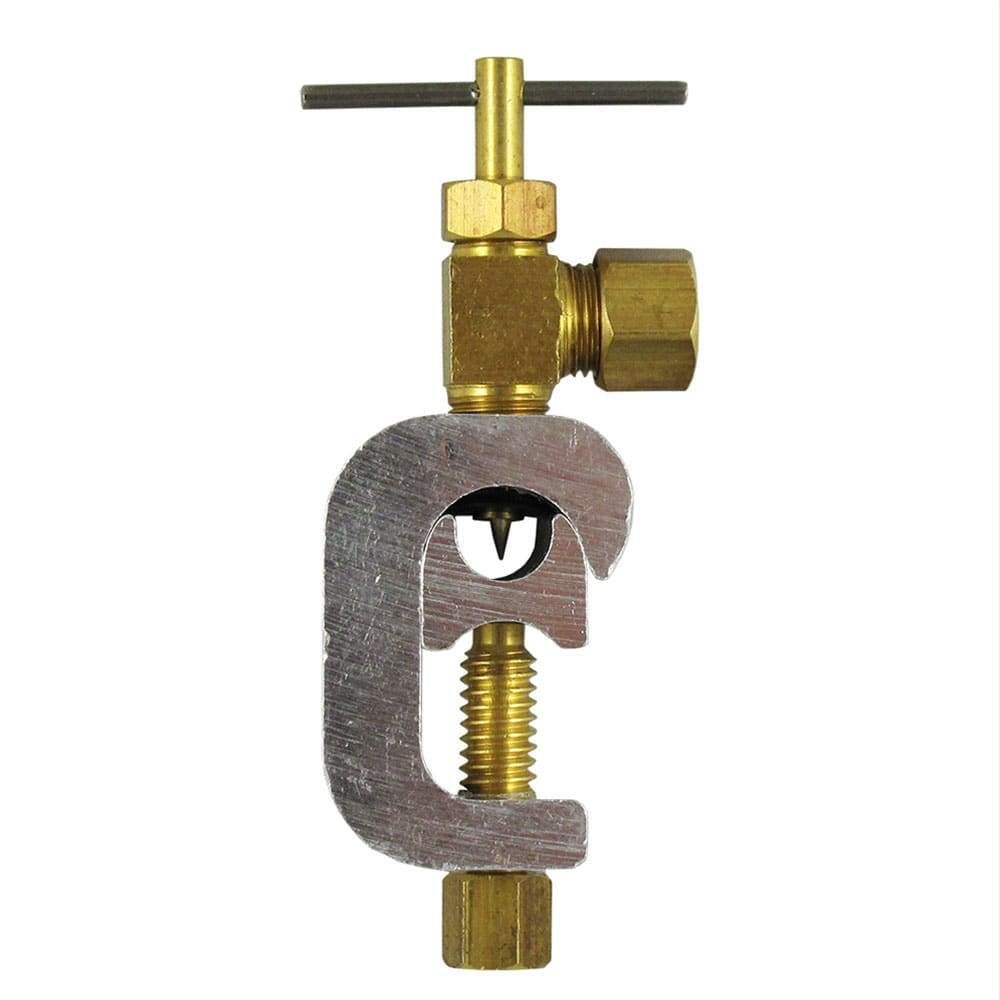
Step 2: Install a Cold Water Line Next, you'll need to install a cold water line. This line will connect the RO system to your main water supply. You'll need to turn off your main water supply before you begin this step.
Once the water is off, you'll need to cut into the cold water line and install either a self-piercing clamp or a hose connector. The water supply connection will allow you to divert water to the RO system.

Step 3: Connect the Drain Line The drain line is an essential component of a RO system. It helps to remove the impurities and contaminants from the water. To connect the drain line, you'll need to install a drain saddle on your main drain line. The drain saddle will allow you to connect the drain line from the RO system to your main drain line.
![]()
Step 4: Install the RO System Once you have installed the cold water line and the drain line, you can install the RO system. Most RO systems come with a pre-filtration system, a reverse osmosis membrane, and a post-filtration system. You'll need to follow the manufacturer's instructions to install each component. All Osmotics RO Systems come complete with a comprehensive instruction manual and round-the-clock support. You can download our instruction manuals from the product pages by clicking on the 'product downloads' tab.
Step 5: Test the System After you've installed the RO system, you'll want to test it to make sure it's working correctly. Turn on the main water supply and let the system run for a few minutes. Check for any leaks or malfunctions. You may also want to test the water to make sure it's clean and filtered. In conclusion, installing a RO system in your home is a great way to improve the quality of your drinking water. By following these simple steps, you can connect a RO system to your home and enjoy clean, filtered water in no time.