How to Install a Reverse Osmosis System at Home: Step-by-Step Guide 2026 | Osmotics UK
0%
Installing a reverse osmosis (RO) system under your kitchen sink is one of the most effective ways to enjoy consistently pure drinking water at home. Modern RO systems are straightforward to fit with standard quick-connect fittings, and the process typically takes 1–2 hours for a competent DIYer.
This updated 2026 guide walks you through the complete installation process for a typical under-sink drinking water RO system. Optimised for searches such as how to install RO system UK, reverse osmosis installation guide, connect RO system kitchen sink and DIY RO system setup.
Ready to get started? Shop Osmotics Drinking Water RO Systems or the high-capacity Pentair PRF RO System – complete kits with all necessary fittings and clear instructions.
Before You Begin: Tools and Preparation
Most Osmotics RO systems include everything needed for standard installation. You will typically need:
- Adjustable wrench and screwdriver set
- Drill (for faucet hole if required)
- Teflon tape and pipe cutter (optional)
- Bucket and towels for any initial spillage
Always read the specific manual supplied with your system. All Osmotics kits come with detailed instructions and ongoing UK-based support.
Step 1: Choose the Right Location
Select a cupboard under the kitchen sink with adequate space for the filter housings, membrane, and pressure tank. Ensure good access for maintenance and keep the unit away from extreme heat, direct sunlight or freezing temperatures.
Step 2: Install the Feed Water Connection
Turn off the main cold water supply. Install a self-piercing saddle valve or a better-quality tee fitting onto the cold water pipe. Connect the 1/4" tubing from the RO system to this feed point. Quick-connect fittings make this step tool-free and reliable.
Step 3: Install the RO Faucet
Drill a hole in the sink top or worktop (if no existing hole) and mount the dedicated pure water faucet. Connect the tubing from the post-filter or tank to the faucet. This separate tap ensures you only use pure water for drinking and cooking.
Step 4: Connect the Drain Line
Attach the drain saddle valve to the sink waste pipe (downstream of the U-bend). Connect the 1/4" drain tubing from the RO system. This line carries away the wastewater (concentrate) produced during filtration.
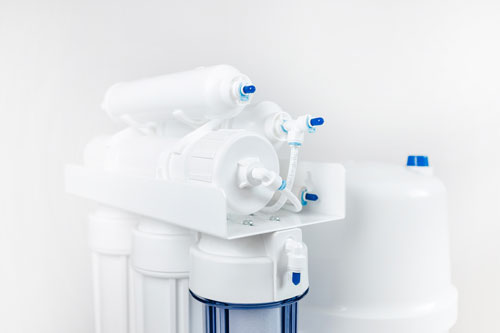
Step 5: Assemble and Position the System
Install the filter housings, RO membrane, and pressure tank according to the colour-coded tubing diagram. Most systems use quick-connect fittings for fast, leak-free assembly. Position the tank and filters securely in the cupboard.
Step 6: Initial Flush and Testing
Turn the water supply back on slowly. Check all connections for leaks. Allow the system to fill and flush for 30–60 minutes (or as instructed) to remove carbon fines and manufacturing residues. Test the output with a TDS meter to confirm performance.
Common Installation Tips and Mistakes to Avoid
- Double-check tubing is fully inserted into quick-connect fittings until it clicks.
- Ensure the flow restrictor is fitted correctly on the membrane drain line.
- Do not overtighten housings – hand tight plus a quarter turn is usually sufficient.
- Flush the system thoroughly before drinking the water.
Frequently Asked Questions
Most DIY installations take 1–3 hours depending on experience and whether a new faucet hole is required.
No. The majority of users successfully install Osmotics systems themselves using the supplied instructions and quick-connect fittings.
Yes. The connections are non-permanent and can be removed when you move.
Check tubing insertion depth and O-rings. Most minor leaks are resolved by reseating connections. Contact our support if needed.
Enjoy Pure Water from Your Own RO System
Proper installation ensures reliable performance and easy future maintenance for years to come.
Installing a reverse osmosis system is a rewarding DIY project that provides high-quality pure water for your family. With modern quick-connect components and clear instructions, most homeowners can complete the job confidently in a single afternoon.
Osmotics supplies reliable, easy-to-install drinking water RO systems designed specifically for UK homes. Explore our standard Drinking Water RO Systems or the robust Pentair PRF RO System for higher demand.
Need help during installation? Comment below or email [email protected] – our team is here to support you.
Subscribe for more practical installation guides and water filtration tips.